Quantcast
Channel: Parts Express Project Gallery
Viewing all 739 articles
Browse latest View live

Beta Boxes

$
0
0

Designer:

4-Matdesign

Project Category:
Bookshelf Speakers

Project Level:
Beginner

Project Time:
8-20 Hours

Project Cost:
$100 – $500

Project Description:
The goal was to learn how build speakers and at the same time upgrade to match a 35w 1976 sony receiver.

Design Goals:
Create a clean speaker box using the minimum of materials and enclosure size with materials and tools available at the time. This was a budget concern.

Driver Selection:
BR-1

Enclosure Design:
Based on kit specification volumes. (+/- 2%)

Enclosure Assembly:
3/4″ “Beta” plywood panels. This 17 ply High Density Overlay panels is used in concrete forms and road signs. The box is fastened using a hybrid Kreg pocket/countersink screw method. Interior seams are caulked with 100% silicon.

Crossover Design:
BR-1

Conclusion:
These speakers sound clear and as loud as my 1976 receiver will give it. No static or vibrations. A little soft on the bass at low volume, but great for TV listening. then put the turntable on with high volume and it evens out.

About the Designer:
Architect with a resurfaced passion for the combination of great sound and design.

Project Parts List:

BR-1 Kit Components
Speaker Cabinet Port Tube 1″ ID x 4″ L Flared

MTA

$
0
0
cover alone messy crossover1 inroom_response modeled_response

Designer:
Grant Gustavsen

Project Category:
Bookshelf Speakers

Project Level:
Intermediate

Project Time:
8-20 Hours

Project Cost:
$100 – $500

Project Description:
The MTAs are More Than Able to fill a room with sound. This two way bookshelf speaker utilizes a 6.5″ Dayton aluminum mid-woofer and a Dayton waveguided dome tweeter. Their lower end frequency range is extended with two Dayton 6.5″ passive radiators(one on each side).

Design Goals:
I wanted to design a mini-monitor capable of reproducing the majority of frequency range. I also wanted them to have a relatively wide dispersion as not to limit the “sweet spot” to a single couch cushion. The use of double passive radiators provides a force-canceling effect.

Driver Selection:
I have had great results using Dayton drivers in the past. For this build, I intended on modeling the crossover using WinPCD. Dayton provides the necessary FRD and ZMA files for most of their drivers to accurately design the crossover ahead of time. The new 6.5″ Aluminum Designer Series Woofer(DSA175-8) had the appropriate upper frequency extension while modeling well in a relatively small “ported” enclosure. The Dayton Waveguide Neo Dome Tweeter(ND25FW-4) is an inexpensive choice and had the wide dispersion i was looking for. Lastly, the 6.5″ Dayton Passive Radiators(SD175-PR) were the only choice to match the aesthetics of the Designer Series active woofer. The passive radiators were tuned to ~50Hz with the addition of three 3/16″ (1 1/4″ OD) fender washers each.

Enclosure Design:
The enclosure is Denovo Audio knock-down MDF 0.23 cu. ft. mini bookshelf speaker cabinet. The woofer is located centered on the front baffle and comes 1/4″ from the bottom. The tweeter flange is off-center and is 1/4″ from the top, side, and woofer flange. Each side of the enclosure has a passive radiator centered on it.

Enclosure Assembly:
The Denovo Audio flat pack enclosure went together flawlessly. I chose to flush mount the drivers on the front baffle but this was purely aesthetic. I also changed the look of the stock box by capping four sides with an additional layer of 1/2″ MDF. I cut them 1/2″ deeper than the cabinet and back chamfered the front inside edge for a modern look with a vintage feel. I mitered the panels then glued and clamped them in place. I flush mounted the passives in a 45* recess. I accomplished this with my Jasper Jig and a v-groove bit in my plunge router. I glued a 6″ x6″ piece of acoustic foam to the back and filled with polyfill for good measure. I finished the enclosure with sand-able primer and spray enamel. All of these changes in appearance are purely for looks. The stock Denovo Audio box would more than suffice as an appropriate enclosure.

Crossover Design:
WinPCD and the ZMA and FRD files from Dayton guided me to a fourth-order Linkwitz-Riley at 2000Hz. There is a Zobel on the woofer to flatten out its rising impedance. The tweeter has an LRC after the crossover to flatten the impedance peak at resonance. These two circuits allow the fourth-order components to function as predicted. In crossover schematic above, the inductor values are accompanied by their DC resistance. Those are not additional resistors. However, there is a 2ohm resistor just after the first capacitor on the tweeter high pass filter. Also, keep in mind that the polarity on the tweeter is reversed. I hot glued the woofer filter to the bottom of the enclosure and the tweeter filter to the top.

Tips & Tricks:
Have Fun.

Conclusion:
To say that these speakers are “able” would be an understatement. They are More Than Able. They excelled way beyond my expectations. I thought I was going to get an acoustically flat monitor for a desktop or a small format two channel setup. What I got was a knock-your-socks-off, full size loudspeaker experience. The measurements were made using Room Eq Wizard and the Dayton Audio DTA-120 Class T Mini Amplifier at the listening position. If you look at the in-room response, with room gain, the bass extends down to 40Hz. The rising response wasn’t obtrusive either. The upper frequencies were delicate and easy to listen to for hours. Which we did. My father and I put them through their paces with a variety of sample tracks. We start easy with acoustic guitar, make our way through vocal jazz, and end up with full scale orchestral pieces. Imaging with the smaller format music was ever present, while the orchestral music was clear and well defined. As mentioned earlier, the MTAs are “More Than Able”.

About the Designer:
Grant Gustavsen is a member of the Speaker Building Design Team.

Project Parts List

Dayton Audio SD175-PR6-l/2″ Passive Radiator
Jantzen Audio .90 20awe AirCore lnductor Coil
Jantzen Audio 0.70mH 20 AWG Air Core lnductor Crossover Coil
Dayton Audio DNR-7.0 7 Ohm 10W Precision Audio Grade Resistor
Dayton Audio DNR-2.0 2 Ohm 10W Precision Audio Grade Resistor
Dayton Audio DMPC-4.7 4.7uF 250V Polypropylene Capacitor
Dayton Audio DMPC-2o 20uF 250V polypropylene Capacitor
Dayton Audio DMpC-1010uF 250V polypropylene Capacitor
Dayton Audio ND25FW4 1″ Soft Dome Neodymium Tweeter with Waveguide 4 Ohm
Dayton Audio DSA175-8 6-7/2″ Designer Series Aluminum Cone Woofer
Denovo Audio Knock-Down MDF 0.23 cu. ft. Mini Bookshelf Speaker Cabinet

SFE-812 Pro Audio Reference Speakers

$
0
0
last_import__8_of_8 dsc_0421 dsc_0399 last_import__7_of_8 dsc_0405 dsc_0409 e3178bc713e6dcc54aff8252ae7b9385 fcb72da68d38376d856e5f8183600253 last_import__4_of_8

Designer:
Javad Shadzi

Project Description:
The SFE-812 project utilized pro drivers to create incredibly and incredibly dynamic speaker system that meets critical audiophile standards while creating SPL’s well into the 120 decibel range for the highest level of clarity and impact.

Driver Selection:
B&C DE250 Compression Driver 294-605 x 1 each tower

Faital Pro 8FE200 8″ Mid Woofer 294-1171 x 2 each tower

Seos10 Horn

Eminence Mag 12 Subwoofer x 1 each tower

Dayton PA465S 18″ Subwoofer x 1 total 295-042

Enclosure Design:
Large enclosure, dimensions 50″ tall, 15.5″ wide and 15″ deep. Total weight 98lbs including drivers.

Extensive bracing leaving no surface more than 8″ unbraced, bracing heavily engineered and windowed to mantain maximum rigidity with minimal weight and volume displacement.

All drivers flush mounted including Seos10 horn

Enclosure Assembly:
3/4″ maple plywood construction, front baffle 1.5″ thick, only glue used, no metal in enclosure other than screws holding in drivers.

Crossover Design:
Fully active miniDSP 4×10, laptop programmable, crossover points as follows:

Tweeter – 2000hz 24db/octave
Midrange – 150hz 12db-2000hz 24db
12″ Subwoofer – 30hz 48db-150hz 12db
18″ Subwoofer – 20hz 48db-80hz 12db

Tips & Tricks:
Build thread chronicling construction at http://techtalk.parts-express.com/forum/speaker-project-gallery/1277937-seos-12-faitalpro-8-mtm-12-subwoofer-towers

About the Designer:
I own an engineering and manufacturing company for high performance automotive products, I recently rekindled my passion for speaker building and have built over 10 pair of speakers this year since Feb!

Mini J Two-Way Bookshelf Speakers

$
0
0
mini_j_twoways_461 mini_j_twoways_46 mini_j_twoways_45 mini_j_twoways_35 mini_j_twoways_13 mini_j_twoways_28 mini_j_twoways_14 mini_j_twoways_4 mini_j_twoways_5 mini_j_twoways_8 mini_j_twoways_9 mini_j_twoways_18 mini_j_twoways_25 mini_j_twoways_31 crossoverimage miniJcad

Designer:
Dan Marx

Project Category:
Bookshelf Speakers

Project Level:
Beginner

Project Time:
1-8 Hours

Project Cost:
Under $100

Project Description:
This is a great beginner two-way speaker project that has the potential to provide big sound in a small package at a reasonable cost. The design uses inexpensive drivers and a simple 8-element crossover that works well with all music types. The speakers were originally designed for my teenage daughter as a birthday present and are meant to be used in a small bedroom for basic music listening. Though with that in mind, they exceeded my expectations in terms of sound quality, flatness, sound stage and bass response. So may I present, the Mini J Two-Way Speakers.

Design Goals:
The design goal was $100 two-way vented bookshelf speaker meant for all music types to be used in a small bedroom or living space. An enclosure that is small enough that can be made with leftover MDF from other projects. Weekend speaker project, can be built in one to two days. Little speaker design or woodworking skill required. Big sound in a small package. Simple passive crossover design. All components sourced from Parts Express.

Driver Selection:
This speaker starts with a Dayton Audio Designer Series 5″ woofer and a 1″ Vifa soft dome tweeter. The DS series woofers from PE represent an excellent value, have a great look, and surprising bass response for a driver this small. Decent Xmax and a low fs make this little driver perform very well in a small cabinet size. The great upper frequency extension make crossing over to almost any tweeter a walk in the park. And for the tweeter I picked the Vifa DX25TG59-04 which has great power handling, low fs, and a smooth, flat response out to 20 kHz. It’s got a wide-roll surround around the dome and just has a great overall look to it.

Enclosure Design:
I drew up some initial plans and started tweaking the cabinet volume and shape until I came up with something I really liked. I used Unibox to model the speaker response and ended up going with the Standard Design model which yields an f3 of 59 Hz in a 5.4L cabinet tuned to 56 Hz with no hump or dip in the response. This requires an enclosure size of 11.25x7x9 (HxWxD) using a mixed panel thickness of 1/4″, 1/2″ and 3/4″ MDF. Parts Express had also recommended a similar enclosure volume but they also recommended specific dimensions that meet what’s called the Golden Ratio. So I gave it a shot and I intentionally made the height and width conform to this Golden Ratio which is 1.618:1. There’s some great reading about the Golden Ratio over on Wikipedia if you’re interesting in killing a few more minutes. Aesthetically the most pleasing rectangular shape to look at and quite possibly exhibits superior sonic properties t han other ratios. Hey, but I won’y get into that here. They look great to me and they sound fantastic too.

Enclosure Assembly:
The cutsheet in this case is a little unique since I used various thicknesses of leftover MPF from other projects. The box design consists of (3) panels of 3/4″ MDF that make up the front, brace and back each piece being 6″x10.25″. The sides and top and made up of 1/2″ MDF which are cut at 8.75″x10.25″ (sides) and 8.75″x7″ (top/bottom). These cuts were a breeze on my table saw and were designed this way so as to allow the table saw to be set to each dimension only once and every cut made so that every cut that is dependent on a flush fit when assembled is exactly the same size, even if the saw isn’t cutting each piece at exactly the width it should. It doesn’t matter because all the pieces that fit together that require that dimension just end up being the same. The only cut that matters is the width of the top and bottom pieces which need to be cut to whatever the width of the front/brace/ba ck ended up being +1.0″. With a table saw, every cut comes out near perfect anyway but even if they didn’t, this design allows for a little slop in each cut while still providing a perfectly flush fit. The enclosure has a single internal window brace and is glued and screwed together with butt joints and drywall screws. Nothing too fancy needed here. The tweeter is flush-mounted using a second piece of 1/4″ MDF mounted on top of the front baffle. The woofer sits on top and looks great even without flush mounting due to the unique basket design of the Designer Series woofers. This also allowed me to mount the woofer and tweeter closer together so that the woofer baffle actually overlaps the tweeter baffle which aids in achieving a better “single point” dispersion response. The screws were puttied over in the end, sanded and the speakers painted in a medium dark plum-like purple color.

Crossover Design:
I love that PE provides FR and ZMA data for the Designer Series drivers because it’s makes is so easy to import into crossover designing tools such as Passive Crossover Designer. While the Vifa tweeter did not have raw data, I made good use of SPL Trace to create data from the datasheet by tracing the FR and ZMA plots into data files. I’ll try and be brief on the crossover design and my methods of doing crossover design because quite frankly it’s just that, my method, and I’m still tweaking and proving my method with each new speaker design. I’m not sure I’m there yet, but this is actually a big part of the fun of speaker building. I always shoot for the simplest crossover with the fewest elements to achieve the flattest FR and a decent impedance. I typically add a Zobel network to the woofer to flatten the impedance above fs which helps with the high-frequency roll-off. The woofer is a 12dB/octave set at about 2,700 Hz with a cap value that is about double the textbook design value. This provides a sharper roll-off without peaking just before cutoff. The tweeter also ended up being a 12 dB/octave but wired in phase with the woofer. The inductor in this case is also slightly tweaked to be lower than the textbook value which also increases the slope slightly and according to the simulation blends/sums well with the woofer on-axis. I also added a 4 ohm series resistor and a 20 ohm shunt resistor (aka L-pad) to pad the tweeter and match the overall level of the woofer. It also brings my impedance of the system up to around 8 ohms which is where I wanted it for an easy load to even the cheapest amps. I played around with tweeter balance quite a bit and am happy where it ended up, though the L-pad values could be tweaked to provide a brighter or mellow sound to your liking.

Tips & Tricks:
You can still flush-mount drivers even without a fancy router or router jig by gluing a sheet of 1/4″ MDF over the front baffle which is available at most big box stores.
Buy extra values of capacitors and resistors (and inductors if you can afford to do so) so you can tailor your crossover while listening to the speakers real time. I like to use a small breadboard to test different values and then use alligator leads to clip onto each part while I both listen and take measurement data. It’s great to be able to do rapid A/B comparisons (sort of like getting your eyes checked) and fine tuning what sounds the best to you ears.

Conclusion:
These speakers were a lot of fun to design and to build and I have enjoyed listening to them as often as I can. They have a very subtle and laid back presence to them and actually sound great with all types of music. Vocals sounds rich and warm and overall the speakers give off a bigger sound than they look. Bass is surprising for a speaker this small. Don’t let the low-cost drivers fool you into thinking they are cheap speakers because a well-built cabinet and a decent crossover with quality components tailored for these drivers can really make this setup shine.

About the Designer:
My name is Dan Marx and I’ve been designing and building speakers for over 25 years. And I’ve been purchasing products from Parts Express for about just as long. I’m an Electrical Engineer by trade and a DIY enthusiast by night. I’m married with 4 children and I love to play guitar and piano, I love writing music and watching movies and just spending time with my family and last but not least…designing and building speakers.

Project Parts List:

Dayton Audio DS135-8 5″ Designer Series Woofer Speaker
Peerless by Tymphany DX25TG59-04 1″ Fabric Dome Tweeter
Parts Express Speaker Cabinet Port Tube 1-3/8″ ID Adjustable
Speaker Terminal Cup with Insulated Gold Plated Binding Posts
Jantzen Audio 0.40mH 20 AWG Air Core Inductor Crossover Coil
Jantzen Audio 0.80mH 18 AWG Air Core Inductor Crossover Coil
3.3uF 100V Electrolytic Non-Polarized Crossover Capacitor
8.0uF 100V Electrolytic Non-Polarized Crossover Capacitor
Dayton Audio DNR-4.0 4 Ohm 10W Precision Audio Grade Resistor
Dayton Audio DNR-20 20 Ohm 10W Precision Audio Grade Resistor
Dayton Audio DNR-8.0 8 Ohm 10W Precision Audio Grade Resistor

Pandora’s Box

$
0
0
back1 front2 side vert

Designer:
Mike W.

Project Category:
Portable Speakers

Project Level:
Intermediate

Project Time:
1-8 Hours

Project Cost:
$100 – $500

Project Description:
Pandora’s Box is a portable, battery operated/plug-in, boom box. It is a separate speaker with a Dayton Audio DTA-1 amplifier capable of 15W/channel piggybacked on to it. The DTA-1 can run on 8 AA batteries or the supplied 2A 12V AC adapter.

Design Goals:
Create a portable boom box (small, light, rugged) that can operate on AA rechargeable batteries with outstanding sound at a reasonable price. Source is from an iPhone running Pandora, which rests on the unit and connects via headphone jack to the amp via the included cable.

Driver Selection:
2 x [290-208] Dayton Audio ND90-4 3-1/2″ Aluminum Cone Full-Range Driver (4 ohm).
1 x [264-841 Tang Band 13-1761S 1/2″ Silk Dome Tweeter Pair (8 ohm).

Enclosure Design:
The single enclosure is made of ½” MDF glued together. The edges are chamfered using a router. The box is finished off with a textured vinyl wrap and carrying handle.
• Exterior dimensions: W x H x D: 12” x 4 ¾” x 8”
• Interior Volume: 0.167 cuft
• 1” Port tube cut to 2” in length to achieve Ported F3 of 59Hz
• 1.5oz of Acousta-Stuf

Enclosure Assembly:
Enclosure is a simple rectangle with the pieces glued together with wood glue. It was temporarily screwed together while the glue set. Screws and/or nails could not be left in place as the edges are camfered (1/4 round) with a router.

Crossover Design:
I attempted to use the 12db 5kHz crossovers from PE but this rendered the tweeters unusable (horrible distortion and attenuation). So far, I have experienced no issues with having them in parallel/full-range even at maximum volume. Currently the drivers and tweeters are wired in parallel and are both operating as full range. So far, I have experienced no issues with having them in parallel/full-range even at maximum volume.

Tips & Tricks:
To secure the phone I used one of those grippy rubber pads. You know the kind you can buy for your car dashboard to keep your phone from sliding around. It is quite safe to carry this around by the handle and not have the phone fall off.

Conclusion:
The sound from this little box is inspiring for its size with surprising good bass response. The midrange is excellent and the tweeters are a “must add”, to achieve excellent clarity at the high-end. I am using Panasonic Eneloop AA rechargeable batteries and they have lasted exceeding long as I have yet needed to recharge them (it’s been over a week of regular use). The amp is held in place via Velcro, which allows easy access to the underside battery compartment when it’s time to recharge/replace the batteries.

About the Designer:
I am an Electrical Engineer by profession and a fairly handy person. This was my first speaker build and I had a lot of fun doing it!

Parts Used:
PE Parts List for build:
2 290-208 Dayton Audio ND90-4 3-1/2″ Aluminum Cone Full-Range Driver (4 ohm)
1 300-380 Dayton Audio DTA-1 Class T AC/DC Amplifier 15 WPC
1 260-760 Vintage Marshall Style Black Bronco Tolex Vinyl Speaker Cabinet covering
1 320-435 Adhesive Rubber Feet Dome Shaped 12-Pack
1 262-306 Penn-Elcom 0394BK Black Rubber Strap Handle 7″ x 1″
1 269-013 Dual Channel Speaker Wire Terminal Plate with 550 Hz High Pass Filter (Must remove high pass filter!)
1 260-317 Acousta-Stuf Polyfill 1 lb. Band
1 264-841 Tang Band 13-1761S 1/2″ Silk Dome Tweeter Pair (8 ohm)
2 260-170 Speaker Cabinet Jumper Wire 24″ with 0.205″ Disconnects
1 260-470 Port Tube 1″ ID x 4″ L Flared 1.98 1.98

Additional Items required which I already had on hand:
• 2’x2’x1/2” MDF
• Wood Glue
• 3M 77 Adhesive
• Velcro
• Black pan head screws
• 4” Automotive Speaker Grills
• Speaker wire (Amp to Speaker) and assorted female crimp-on terminals

Optimus Pro-X7 Rebuild

$
0
0
x7_11 x7_12 x7_10 pro_x7_l_2_feet_1 pro_x7_l_2_feet_1_no_grill tymphany_nearfield_tweeter_height pro_x7_with_tymphany_woofer_xo_as_built

Designer:
Chris N

Project Category:
Bookshelf Speakers

Project Level:
Beginner

Project Time:
1-8 Hours

Project Cost:
Under $100

Project Description:
This is a simple rebuild of the first pair of speakers I ever bought, the Optimus Pro-X7, which is basically the same as the Minimus 7.

Design Goals:
I set out to design a proper crossover for the stock speakers, to provide a smooth, even response.

Driver Selection:
299-279 Tymphany TPY04W08O001ES

The Tymphany is a nice buyout driver that PE sold a few years ago. I added a pair to my order for another project, knowing I would find a use for them. They have a nicely vented frame, and the shape and driver holes fit in place of the Pro-X7’s stock pincushion frame.

I retained the stock tweeter. Its measured performance was good.

Enclosure Design:
It’s the stock aluminum cabinet. One side of the cabinet is covered with a piece of foam from the factory. It has one, small diameter, vent. I left the vent open and did not change the length, as it modeled well with the Tymphany driver. If you play them at high levels with out a subwoofer, you may hear some chuffing from the vent, easily remedied by placing some polyfill in the vent.

Enclosure Assembly:
The cabinet is easy to disassemble. After removing the grill, remove the 4 rubber retainers that hold the grill on. Behind those are 4 screws. Remove them, and wiggle the baffle loose.

Crossover Design:
The drivers were measured in cabinet using ARTA, and I developed the crossover by applying crossover components to the drivers and measuring them individually, in contrast to my usual approach of using the driver files in PCD.

The crossover is a simple second order (electrical) with only 5 components. No padding of the tweeter was necessary. I used the .50mh coil that the speaker was born with. The woofer inductor was another buyout from Parts Express, and I unwound it to the desired value. A small gauge air core inductor of the same value will suffice, and not use up a lot of cabinet volume.

Feel free to experiment with different values for the woofer inductor and padding the tweeter. Rooms differ, and people’s taste varies.

Tips & Tricks:
There’s not much room inside for the crossover. The stock inductor in mounted the speaker terminal, and you can leave it there if desired. I zip tied the components together and hung the from the port tube, making sure nothing could short out on the cabinet or drivers. The speakers do perform better with the grill removed, but it isn’t bad with them on. I’ve include both measurements in the images below.

Conclusion:
This project went together well. The sound isn’t harsh and doesn’t draw attention to itself. They don’t play the lowest bass, but they do play lower and much louder/cleaner than the HiVi B3 MTM’s they replaced. I enjoyed improving the speakers that I’ve spent so much time listening to.

About the Designer:
I’ve been modifying, designing, and disassembling speakers (and everything else) for as long as I can remember.

Rally Sport

$
0
0
DSC_0839 DSC_0843 DSC_0844 DSC_0847 DSC_0853 DSC_0854 DSC_0855 DSC_0860 IMG_7476 IMG_7502 IMG_7591 IMG_7606 IMG_7680 IMG_7682 IMG_7719 IMG_7876 Rally Sport XO Pic Rally Sport Final FR Rally Sport XO

Designer:
Javad Shadzi

Project Category:
Tower/Floor

Project Description:
Home theater and modern music benefit from efficient and dynamic speakers, there are many small and compact speaker designs that make dynamic compromises for clear sound in a small package. If one is willing to throw proportional correctness out the window, a speaker design like the Dayton Rally Sports will open up a new world where sound is not just heard, but felt and experienced as well!

Smooth linear frequency response defines many of the best speaker designs on the market, but without driver size, displacement and efficiency, sound cannot be reproduced in the most dynamic way. Employing Dayton Pro Audio drivers, the Dayton Rally Sports build on smooth frequency response. With efficiency and the ability to truly deliver transients in music and movies, the Rally Sports engage any listener with dynamic listening that evokes the startling realism available in the recording. Three drivers, all optimized in their usable frequency ranges, excel at delivering transient, accurate and low distortion playback, not only with sparkling detail but at stunning volume levels if desired. Any simple amplifier will easily drive the Dayton Rallys to powerful sound pressure levels, even 15 watts per channel can deliver 100+ decibel sound levels.

Design Goals:
1 – Efficient – with minimal power tremendous volume levels can be achieved, base efficiency for this speaker is about 93db/watt.
2 – Flat and smooth frequency response – The Rally Sports are quite flat from 40Hz to over 15kHz and vary less than 5db in that range. They also have a slight downward tilting response which provides warm sound and sibilant free high frequency response.
3 – Affordable – though not the cheapest speaker to build, the Rally Sports can be built for well under $1000 and can be run off any readily available amplifier with their 8 ohm loads.
4 – Beautiful – for my personal execution, I wanted something that would hold up to any decor or furniture in our home, however these can be built like PA speakers or much simpler painted or veneered MDF cabinets.

Driver Selection:
The following Dayton Audio drivers were used:
Woofer –
PA385S 15″ Pro Woofer – This woofer was chosen for it’s combination of low Fs and efficiency, it can play up to 500hz cleanly if needed and in a reasonable enclosure has good response down to 30hz. Typically true subwoofers with very low Fs around 20hz are very inefficient, on the other end of the spectrum pro woofers with 100db sensitivity can rarely play down below 50hz. The PA385S is a reasonably rare combination perfect for this type of high efficiency, full range home speaker.

Midrange
PA165-8 6″ midrange – This mid was chosen for it’s smooth response up to 2khz, in this application it is being crossed over at that point. It also has good efficiency which matches the woofer’s.

Tweeter
D250T-8 Compression Driver – affordable and high quality compression driver with 1.7” voicecoil and 1” throat. Don’t expect strong response up to 20kHz, however I am about 40 and can only hear to 16k, most music has little content above 10k, this has good usable output past 15kHz and is quite common for compression driver tweeters.

Horn
H6512 1″ Waveguide – any compression driver needs a horn and this waveguide provides consistent dispersion in the horizontal plane, meaning the “sweetspot” effect is diminished and more people can experience high frequency sound with a horn like this. Sound is very uncolored with no honkiness.

Enclosure Design:
Because the Rally Sports are a larger floor standing design, we can splurge somewhat with air volume to allow the woofer to play lower and efficiently with a ported design. After extensive modeling, I chose a 3.8 cubic feet enclosure tuned to 38hz. Lower tuning could be used but output above 40hz will suffer. Since most music features content above 30hz, the 38hz tuning frequency allows strong output to that point with 24db roll off below that point.
That 3.8 does not include the volume of bracing, mid enclosure or of the ports so be sure to include those in the total volume. In my case my mid enclosure used .1 feet, the bracing used .25 and the dual 4” ports .1 as well.
Dual 4” ports end up about 7” long but I always fine tune to the final frequency using Dayton Dats. You can get away with shorter 3” diameter ports but air velocity will be higher and the chance of chuffing as well. On the inside of the port I routered out wooden rings and put ½” roundovers on them, the outside of the ports have a 1.25” radius to allow smooth entry in and out of the port. At full xmax of these woofers (about 11mm) there is absolutely no port sound or chuffing with this design.
Internal dimensions are 38” high, 16” wide and 12” deep but your design may need to be adjusted depending on the port size you use and the amount of bracing you chose.
For the midrange enclosure, I created a reverse horn that I’ll flippantly call an “infinite dampening chamber”, the idea is that sound waves coming off the back of the midrange are concentrated and absorbed inside a smaller, narrower tube so that they cannot reflect back through the cone creating distortion. The back of the enclosure is a 4-sided pyramid that gets narrower as it moves further away from the midrange. It ultimately ends at a 2.75” square opening which transitions into a 3” diameter sealed tube about 4” long. This entire enclosure was stuffed heavily with poly filling.

Enclosure Assembly:
The Rally Sports can be constructed from a variety of materials like Baltic Birch, MDF and other high quality plywoods work well. I use commonly a void free poplar plywood with Maple veneer on each side, it is available from Home Depot and is a full .745” thick. It is very rigid and not as heavy as MDF, the dust is also better to work with, but MDF would result in an even heavier enclosure. The enclosure is braced with 15/32” sheathing plywood. The front baffle and rear back are finally solid poplar heartwood.
I am a strong believer in glue only whenever possible, all joints are glued and clamped with Titebond Premium glue as it cleans up well and dries incredibly strong. I start by cutting and assembling the tops and sides, then the back is glued on and flush trimmed to the sides. From there bracing is built and glued in, and the mid chamber is integrated into the bracing, the front plywood sub-baffle is attached and ultimately the poplar baffles attached and located with dowels and glued as a final step. Front and back edges feature generous 1.25” radius round overs.
I lightly stuff empty pockets inside the enclosure with polyfill being very careful to not black flow to the ports.
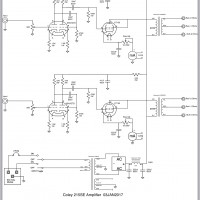
Crossover Design:
I chose to use as simple of a crossover that would do the job for the Rally Sports, but being a 3-way its more complicated than the average 2-way. Crossover points are 200Hz and approx 1300Hz. Slopes between the woofer and midrange are 6 db/octave electrically and about 12 acoustically as I was able to incorporate the natural rolloff of each driver in that range. Between the mid and compression driver are 12/db LR slopes with a Zobel on the midrange to smooth out it’s impedance curve. I also added a baffle step on the midrange to bring it’s response down about 1db towards the CD compared to the CD, the midrange runs 1 db hot and the CD is padded down below the midrange to give that downward slope.
The CD is tamed down, I “voiced” this to have very smooth high frequency response on axis in a typical dedicated audio listening room like I have. If you are using these for actual PA use or Home Theater, feel free to bring the CD up 1-2db, you can achieve this by lowering the value of R1 1ohm at a time until it’s where you want it. An adjustable L-pad could be used as well for the tweeter if you want to change this periodically, it would make sense.
I used reasonably priced good quality components, I’ve listed them below, I’m not particularly a believer in using really expensive components, but if you are you could substitute values as you wish. As these stand they have no trouble with 2-300 watts for long periods of time, I usually run two resistors in series or parallel to achieve the final value to increase their power handling.

Tips & Tricks:
1 – Have fun and challenge yourself – remember you won’t learn anything new if you’re not willing to push yourself, make some mistakes and try to do something you’ve never done before.
2 – In order to achieve the clean 2-tone look with no bleed over of the black stain, I aligned the poplar pieces with the plywood sub-baffles using dowels, then I routed the edges and did all sanding with these pieces doweled in place. Once all woodworking was complete, I stained the plywood enclosure ebony black, then glued and clmped the poplar panels in place, then finally did 4 coats of poly over the whole thing. Trying to tape off and stain rarely works well as the stain will bleed under virtually any tape.
3 – I strongly recommend flush mounting the CD and the midrange to avoid any diffraction issues, the midrange is easy to do with a circle jig, the horn is much harder to do, but doable. Google search the phrase “javad seos horn MTM flush mount”, it should be the first hit, here I do a step-by-step on how to flush mount a horn or non-circular driver.
4 – If you want to use these for portable PA use, I recommend building them out of ½” birch plywood and use moderate window bracing to keep them light and portable. If for home use like me, then weight isn’t as much of an issue, the way I built them they weigh about 90lbs each, these enclosures are incredibly rigid, non-resonant and well dampened.
5 – When I cut the poplar for the front baffle, I let the grain cross from one baffle to the next, so these are a matched pair and when put side-by-side, the grain flows from one to another. Sort of a cool touch.

Conclusion:
The Rally Sports are everything I set out to build, loud, efficient audiophile quality speakers that can be built affordably and driven off just about any amplifier. The Dayton drivers shine in their respective frequency ranges, even at full, deafening volume the drivers do not sound strained. Transients are delivered with startling impact and they play all sorts of music well from jazz, to rock and classical music.
I strived to create a high end tweeter response that would never be considered bright or sibilant, the Rally Sports are easy to listen to, even female voices don’t sound like they are coming out of the tweeter, a pet peeve of mine. Though I love a good dome tweeter, a properly used compression driver has a dry accurate sound that is tough to produce.

About the Designer:
Javad Shadzi owns a high performance auto product engineering and manufacturing company, speaker building is a huge creative outlet and current obsession, with over 12 sets of speakers built in 2016 alone, his wife is thrilled to see what new builds 2017 hold!

Project Parts List:

Dayton Audio PA385S-8 15″ Pro Subwoofer 4″ VC 8 Ohm
Dayton Audio PA165-8 6″ PA Driver Speaker
Dayton Audio DT250T-8 1″ Titanium Compression Horn Driver 1-3/8″-18 TPI 8 Ohm
Dayton Audio H6512 6-1/2″ x 12″ Waveguide 1-3/8″- 18 TPI
ERSE 4.5mH 18 AWG I Core Inductor Crossover Coil
Jantzen Audio 1.2mH 20 AWG Air Core Inductor Crossover Coil
Dayton Audio DMPC-10 10uF 250V Polypropylene Capacitor
33uF 100V Electrolytic Non-Polarized Crossover Capacitor
10uF 100V Electrolytic Non-Polarized Crossover Capacitor
Jantzen Audio 1.0mH 20 AWG Air Core Inductor Crossover Coil
50uF 100V Electrolytic Non-Polarized Crossover Capacitor
Dayton Audio BPA-38G HD Binding Post Pair Gold
Dayton Audio DNR-6.0 6 Ohm 10W Precision Audio Grade Resistor
Dayton Audio DNR-5.6 5.6 Ohm 10W Precision Audio Grade Resistor
Dayton Audio DNR-3.7 3.7 Ohm 10W Precision Audio Grade Resistor
Dayton Audio DNR-10 10 Ohm 10W Precision Audio Grade Resistor
3.3uF 100V Electrolytic Non-Polarized Crossover Capacitor

Act 1

$
0
0
front3 back_panel baffle_back compare_window

Designer:
Neil Davis

Project Category:
Subwoofers

Project Level:
Beginner

Project Time:
1-8 Hours

Project Cost:
$100 – $500

Project Description:
Act 1 is the first in a series of designs that will result in a compact yet potent wireless 2.1 system that can be used for computers, TV’s and other entertainment equipment. This Act 1 project will evolve from a basic subwoofer to a DSP-based subwoofer (Act 2), to a 2.1 system (Act 3) to a wireless active speaker (Act 4). The final product will be similar, but hopefully better than the large Sonos Play speaker. So, I like to think of this overall project as a Play with 4 Acts.

The Act 1 subwoofer will use two 5-1/4” Tang Bang W5-1138SMF woofers in a Dayton Audio B-REX removable/replaceable baffle enclosure. These boxes are somewhat larger than I needed and a bit more expensive than a “basic box”. However, this box will undergo extensive changes throughout this project, and the replaceable baffles will allow me to quickly try out different variations of amplifiers and drivers. There is a companion project (Chatoya) that uses a solid hardwood enclosure and a passive radiator that will allow comparing results of different bass extension or enhancement approaches.

Design Goals:
The primary goal of Act 1 is to evaluate the design of a small sealed subwoofer with a conventional subwoofer amp that provides bass boost. I wanted to compare this design to a similar version using a passive radiator and another with DSP. These variations needed to use the same driver to allow a “fair” comparison of the cabinet and electronics, so all of the variants use the Tang-Band W5 driver.

Driver Selection:
The Tang Bang 5-1/4” subwoofer is one of the few small drivers with a large enough excursion to work well as a subwoofer. This driver is available with either a neodymium magnet (PE 264-831) or a ferrite magnet (PE 264-917). Since weight is not a concern for this design, we went with the lower cost ferrite version.

Enclosure Design:
Since I needed different back panels to test out these variations, the Dayton 302-836 1.0 cu. ft. enclosure is ideal for this application. The Dayton enclosure uses a recessed back panel with 8 machine screws for securing an MDF back panel. I also ordered some aluminum plates cut to size at Online Metals that I could use as alternative back panel. The aluminum plate will serve as a heat sink and a chassis for the amplifiers that get added in later modifications. The 1.0 cu. ft. volume is higher than what I wanted, but it’s the smallest of the B-REX series and I knew that I could always throw a brick or two inside if I wanted to test the design with a lesser volume. Since this is a speaker that will be subject to many changes and scratches and dings are likely, I went with a basic black vinyl version of the Dayton Audio enclosure: the SWC1-VI (302-836).

The plate amp is the Yung SD100. The Yung amp comes in two versions, one with 6db boost at 45Hz (PE 301-502) and one without the boost (PE 301-500). The Yung amplifier is somewhat unique in that the preamp section is much more complex than most subwoofer plate amps. It’s also easy to get to the circuitry, as there is no cover and both the front and back of the circuit board are exposed. It provides a high pass filter centered at 30Hz with a Q of 1.2 and a peaking filter centered at 46Hz with a Q of 2 and a Gain of 1.26. In order to decide between the boosted or non-boosted version of the amps. I modeled the response using PSD-Lite.

PSD-Lite is a full-featured loudspeaker modeling program, including crossover, baffle diffraction and box models, but to model the subwoofer response you only need to use the “Box” and “Amplifier” modules. The box model part of the program uses the same Benson model as Jeff Bagby’s spreadsheet program, Woofer Box and Circuit Designer (WBCD). In fact, this part of PSD-Lite was mostly written about 10 years ago, as an effort to convert Jeff’s spreadsheet into a .NET program. The PSD-Lite amplifier module was recently updated to model the Multifunction Bandpass Filter in the Yung SDXXX amps.
I modeled the drivers and enclosure for both the boosted version and non-boosted versions, and the results are shown in the accompanying chart. The boosted version of the amp gives much better bass extension (F3 = 35Hz vs 60Hz for the non-boosted version) and does not result in excessive cone excursion for the 100W amplifier. The boosted version results in a mild 3 to 4 dB peak around 50Hz. The boost frequency of 46Hz would probably work better for a smaller enclosure, but still, the F3 of 35Hz is impressive and the boosted response is usable.

It turns out that we can get a bit more bass extension without any peaking by modifying the filters in the SD100. However, doing that will void your warranty and you need the right soldering equipment and have the right experience to ensure success. For those who are daring enough to attempt these warranty-voiding modifications, there is an article at this website that describes how to determine the optimum filter values and how to change the components to achieve that response: http://www.audiodevelopers.com/yung-sd100-plate-amp-modifications/.

By using the bass boost optimizer feature in PSD-Lite, I got a somewhat lower F3 of 30Hz at 96dB with an F10 of 23Hz. Not bad for a pair of 5-1/4 drivers in a sealed cabinet! This extended response can be achieved by changing just 4 through-hole capacitors. I could get a lower and flatter response by allowing the optimizer to change the resistor values, but these are SMD resistors and are a bit more difficult to swap out. So, I went with the capacitor-only modification. PSD-Lite has a design comparison feature where you can see the results of up to 3 different designs. The accompanying chart is a screen capture of the design comparison window, which shows the boosted, non-boosted and modified amp results.

Enclosure Assembly:
The SWC B-REX cabinets are pre-assembled and easy to use. I went ahead and countersunk the drivers, even though diffraction issues are minimal in a subwoofer. I cut the opening in the back for the amplifier and wired the drivers in series. This results in an 8-ohm load impedance. However, the amplifiers use a reasonably high supply voltage (plus and minus 53V), so total output with this 8-ohm load should still be in the 100W range. BTW, that’s another good reason for using the Yung amps—the output is not as dependent on load impedance as other amps.

Crossover Design:
The subwoofer uses the Yung SD100 amp to provide a variable low-pass filter for integration with the other speakers in the system. I’ll show the integration with the other drivers in a later article.

Tips & Tricks:
The front baffle is a full 1” thick, which can result in constricted airflow from the back of the driver between the baffle and driver basket. It’s worthwhile routing out some of the material between mounting holes to better better airflow, as shown in the second picture (“scalloped”).

Conclusion:
All 3 key components—the TB W5 subwoofer, the Yung SD100 amp, and the B-REX cabinet worked out well for this first step toward a wireless 2.1 system. I’ve got a nice test bed with good bass performance, with an exchangeable rear panel for the next step in this extended project. Also, I’ve now got some nice software modeling tools for working with the SD100 amplifier, which will also be used in the next few projects.

About the Designer:
Neil is a member of the PE speaker builder design team (SBDT).

Project Parts List

Dayton Audio SWC1-BK 1.0 cu. ft. Subwoofer Cabinet Gloss Black
Tang Band W5-1138SMF 5-1/4″ Paper Cone Subwoofer Speaker
Yung SD100-6 100W Class D Subwoofer Plate Amplifier Module with 6 dB at 45 Hz

A Stereo Singled-End Amplifier Using the KT-150

$
0
0
215seinternal1 215sekt150hammond.jpeg 215selabels.jpeg 215seschematic 215setop

Designer:
Craig J Coley

Project Category:
Amplifiers

Project Level:
Advanced

Project Time:
8-20 Hours

Project Cost:
Over $1,000

Project Description:
This project is the Coley 215SE Stereo Amplifier, a 15W per channel Class A single ended triode (SET) amplifier using triode connected Tung-Sol KT-150 beam tetrodes. The sound of the amplifier throughout its power range is warm, clear, and transparent, an excellent choice for driving open baffle speakers.

Design Goals:
The goal of this design was to produce a zero negative feedback single-ended Class A amplifier with enough power to drive a variety of speakers. The Tung-Sol KT-150 was selected for the output tube because of its 60W plate dissipation and good linearity when wired as a triode. The use of a triode connected tetrode has two distinct advantages, (1) 550V plate voltage compared to 1000V for traditional triodes like the 845, and (2) the indirectly heated cathode requires less mitigation of hum. A Tung-Sol 6SN7GTB was chosen for the preamp tube due to its long reputation as an excellent dual triode preamplifier. A modest amount of cathode resistance was used with each section of the 6SN7GTB to stabilize gain.

Driver Selection:
A pair of Hammond 1628SEA was chosen for the output transformers, a Hammond 278CX chosen for the power transformer, and a Hammond 193J chosen for power supply filter choke. Hammond magnetics are conservatively designed, widely available and modestly priced.

Enclosure Design:
A Hammond 1441-32BK3CWW 17x10x3 walnut side steel chassis was chosen because it can support the heavy transformers and has good appearance. Greenlee knock-out punches were used for all tube socket holes and transformer wire entries. A 1:1 2D CAD drawing was made for all sides of the enclosure which aided greatly in packaging and pre drilling the small chassis. Printouts were made of the drawings, taped to the sides of the chassis and then used as drill guides for all hole centers.

Enclosure Assembly:
Once all holes are predrilled in the Hammond chassis, the tube sockets and transformers can be mounted in preparation for wiring. Neoprene grommets should be used for all transformer wire entries due to the high operating voltage. The power supply capacitors are 220 microfarad, 600V aluminum electrolytics and mounted horizontally for safety.

Crossover Design:
The design of the amplifier relied on experience and vacuum tube models available for LTSpice, a free SPICE simulator. SPICE simulation enabled resistor value optimization and stage gain to be determined for the design power level. Since plate dissipation is not an issue in SPICE, the KT-88 model was used in place of the KT-150 with no notable discrepancies. Not shown in the schematic was a low cost remote volume and power control board that was added as an afterthought. These are available from a wide variety of sources, including eBay and elsewhere.

Tips & Tricks:
The construction of this amplifier is straightforward but should only be attempted by an expert builder who is familiar with the safe handling of high voltage. Most of the parts are available from a wide variety of sources, including Parts Express. Trophy plaque companies can make custom metal plaques to label tube types and controls at the builder’s discretion.

Conclusion:
The amplifier worked to expectation the first time it was powered up and required very little tweaking, a testament to accurate vacuum tube SPICE models. The performance is outstanding with warm sound, good bass and delicate highs. The power reserve is also outstanding, with enough punch to deliver good bass even with inefficient speakers. The cost of this amplifier will run around $1100.00 as shown for the parts alone.

About the Designer:
This project was designed and built by Craig J. Coley of Burleson, TX. I work as an electrical designer and am listed as inventor on 8 US patents in the field of electro-optics. I have been an electronics hobbyist since I built my first Heath radio at age 7 and a ham radio operator since age 11. I can be contacted at craigjcoley@gmail.com.

An Open Baffle Stereo Cart System

$
0
0
ob12expanded ob12wings ob12close ob12folded ob12crossover stereocart3

Designer:
Craig J Coley

Project Category:
Furniture

Project Level:
Beginner

Project Time:
1-8 Hours

Project Cost:
Under $100

Project Description:
This project is called the Coley OB12C Open Baffle Stereo Cart System. It is a full range coaxial open baffle speaker system with hinged and detachable baffles combined with a stereo stand and casters. It was specifically designed to be paired with the Coley 215SE Single Ended Triode Amplifier that is 15W/channel and uses no negative feedback.

Design Goals:
This project began as a desire to improve the portability of a tube amplifier and open baffle speaker set. It was decided to construct a rolling stereo cart with open baffle speakers mounted as hinged and detachable wings. This would allow the open baffles to either be folded out, detached and placed several feet away, or folded up into the cart for convenience. The overall folded dimensions are 19Wx16Dx18H, easily rolled and hidden in the corner of the living room when not in use.

Driver Selection:
It is best to use the largest woofer possible when constructing an open baffle speaker so an Eminence 12” coaxial woofer was chosen because it was the largest size possible with this enclosure. A Dayton polyimide tweeter was chosen because it could be crossed over at 1100 Hz, avoiding the 2 KHz hump in the Eminence response curve. The two drivers together, as a coaxial, save space and made the overall speaker size manageable.

Enclosure Design:
The center section of the cart is made from three (3) 19” long pieces of 16” wide edge glued pine forming the top, front and back. Four (4) pocket screws and glue are used to hold the front and rear covers to the top and an additional poplar 2×2 is installed on the center of the bottom edge from front to back as a stiffener. The caster wheels are mounted to four 2×2 poplar mounts glued and pocket screwed to the inside of the four corners.

The speaker baffles are 16×16, also made from edge glued pine. A 7” long laminated poplar 2×2 is pocket screwed and glued to the center bottom of each baffle to act as a rear support when the baffles are detached and free standing. The baffles are attached to the rear of the front cover with heavy duty lift-off hinges. If light duty hinges are used, expect a lot of sag when the wings are folded because the wings weigh almost 20 pounds each.

Edges of the panels were finished with a router and round-over bit. The 0.75 inch thickness of the speaker baffles allowed easy mounting of crossover components to the rear of the panel. Along the inside back cover are mounted an outlet strip and Bluetooth receiver, allowing both to remain hidden from view in normal operation but accessible if needed. Because solid wood is used, predrilling of holes is mandatory.

Enclosure Assembly:
Assembly is quite easy for anyone with minor woodworking skills. Pocket holes add strength and allow the screws to remain hidden.

Crossover Design:
Since I personally like the sound and smooth transfer characteristics, an 1100 Hertz two-way shunt crossover was used. Crossovers of this type interact with the electrical characteristics of the speaker drivers so once these parameters are measured, the entire circuit can be modeled in SPICE to optimize the component values and performance. In addition to the shunt crossover for the drivers, a series RL network was included to compensate the baffle losses that roll-off at 6dB per octave. The conjugate 6dB per octave reactance characteristics of the RL network will flatten the natural roll-off and thus flatten the frequency response of the entire system. A 10dB loss was deemed acceptable to have the necessary low frequency extension to make the Coley OB12C full range. Although the RL components are not available from Parts Express, they are easily available from other sources. The 35 and 50 ohm resistor used in the network is metal and highly recommend ed due to the higher heat dissipation capability.

Tips & Tricks:
This design counts on at least a 40 pound amplifier to counteract the imbalance of mounting and unmounting 20 pound hinged speakers. Also be careful rolling over thresholds between rooms because the combined 80 pounds of weight can cause the casters to hang; simply ease over thresholds and the cart will do fine.

Conclusion:
The portability and performance of this open baffle stereo cart is astounding. The transparent and encompassing bass of an open baffle makes for easy listening. At the end of an evening of listening, simply fold-up the speakers and roll the whole stereo into a corner of the room for convenience.

About the Designer:
This project was designed and constructed by Craig J. Coley of Burleson, TX. I work as an electrical designer and am listed as inventor on 8 US patents in the field of electro-optics. I have been an electronics hobbyist since I built my first Heath radio at age 7 and a ham radio operator since age 11. I can be contacted at craigjcoley@gmail.com.

Project Parts List:

Eminence Beta-12CX 12″ Coaxial Driver
Dayton Audio DT250P-8 1″ Polyimide Compression Horn Driver 1-3/8″-18 TPI 8 Ohm
Dayton Audio DMPC-40 40uF 250V Polypropylene Capacitor
Jantzen Audio 0.60mH 15 AWG Air Core Inductor Crossover Coil
Triad C-56U 35.0mH Inductor
Vishay/Dale RH02550R00FC02, 50 Ohm, 25W Resistor
Vishay/Dale RH02535R00FC02, 35 Ohm, 25W Resistor

38 hz tapped horn

$
0
0
16508296_771501936345940_8790593190612539354_n 16649548_771524516343682_6389040653477098697_n 16114956_763248300504637_3830142311017927160_n 16300462_763248170504650_4479480559789802653_o 16403405_763248093837991_46142328374378512_o

Designer:
nickc

Project Category:
Subwoofers

Project Level:
Intermediate

Project Time:
1-8 Hours

Project Cost:
Under $100

Project Description:
this is a tapped horn designed by volvotreter. it uses a tang band 1139 and has great response down to 35 hz. total cost for me was about 75 dollars.

Design Goals:
loud deep bass on the cheap.

Driver Selection:
264-919 Tang Band W6-1139SIF 6-1/2″ Paper Cone Subwoofer Speaker

Enclosure Design:
designed by volvotreter, go check out his page he has many cool horn projects.

Enclosure Assembly:
only used half a sheet of mdf. painted with whatever white paint i had lying around.

Crossover Design:
low pass filter on amp

Tips & Tricks:
cut all the pieces accurately. this is more complicated than a ported box and the pieces have to be precise.

Conclusion:
i couldnt be more happy with this sub, not boomy at all. ive thrown everything i have at it from jimi hendrix to some old school bass testers just to see what it could do. it can play it all with ease.

About the Designer:
designed by volvotreter. he has a webpage.

Table Top MCM

$
0
0
img_0606 img_0607 img_0608 img_0609 img_0610


Designer:
Kev

Project Category:
Freestyle Speakers

Project Level:
Beginner

Project Time:
1-8 Hours

Project Cost:
$100 – $500

Project Description:
The Table Top MCM is a Mid Century Modern designed Bluetooth stereo speaker.

Design Goals:
The goal was to design a table top speaker that sparked conversation, looked as good as it sounds and was easy to use. Audio sources can be connected via the 3.5mm headphone jack or flip the toggle switch to turn on the internal Bluetooth module.

Driver Selection:
(2) Dayton Audio ND90-8 3-1/2″ Drivers and (1) Dayton Audio ND16FA-6 5/8″ Soft Dome Neodymium Tweeter.

Enclosure Design:
The box is .215 Ft3 and has (1) 1.5” diameter, 4” long Port.

Enclosure Assembly:
Nothing fancy with the box. All pieces were glued and brad nailed. The speaker cutouts have a 1 ¼” chamfer and the back is removal to swap parts out as needed. The stand is made of maple and oak dowels.

Crossover Design:
Went with a preassembled 2-Way 8 Ohm 5,000 Hz crossover. Part# 260-198

Conclusion:
Very pleased with the overall look and sound from this table top unit. It scores high on the “wife approval factor”. Anyone who has used the ND-90’s knows you can get some decent bass out of this speaker. Don’t let the price of the tweeter fool you. It is equally impressive.

About the Designer:
I have enjoyed wood working since I was a kid. Time to take it to the next level by integrating speakers and electronics.

Parts Used:
1. Dayton Audio KAB-230 2x30W Class D Audio Amplifier Board with Bluetooth 4.0
2. Dayton Audio ND90-8 3-1/2″ Aluminum Cone Full-Range Driver 8 Ohm
3. Dayton Audio ND16FA-6 5/8″ Soft Dome Neodymium Tweeter
4. Speaker Cabinet Port Tube 1-1/2″ ID x 4″ L Flared

shop boombox

$
0
0
img_5705 img_6817

Designer:
James

Project Category:
Portable Speakers

Project Level:
Beginner

Project Time:
20+ Hours

Project Cost:
$100 – $500

Project Description:
Overblown boom box for use in an auto repair shop. Features all bargain stuff from PE: Goldwood 10″ 4 Ohm woofers, 4.5″ mid-ranges, and 2 tweeters. Powered by one of those Lepai car-radio-style receivers.

Design Goals:
Make something my brother could listen to in his auto repair shop that sounds better than a crummy boombox and looks kind of like a Snap-On product

Driver Selection:
GRS 4FR-8 Full-Range 4-1/2″ Speaker Pioneer Type
Part # 292-434
Goldwood GT-322 1″ Titanium Dome Tweeter 3-3/4″ Square
Part # 270-15
Goldwood GW-210/4 10″ OEM Woofer 4 Ohm
Part # 290-320

Enclosure Design:
Bottom is 1.25″ MDF, other sides are .5″ MDF. Top has a sheet of truck-bed lining rubber glued to to it so tools and things can be put on in without scratching it or vibrating off.

Enclosure Assembly:
Wood glue and screws. Sealed seams with silicone caulking and scrap wood bolsters. Corner braces from PE as well. Woofers are underneath (fire downward) and mounted flush. Didn’t bother flush mounting the mids and tweets on the front.

Crossover Design:
Used the super cheap Panasonic buyout terminal cups. 2 for the midrange and tweeters, 2 low-passers for the woofers.

Tips & Tricks:
Don’t be afraid to just do stuff and rework it later. This box went through 2 or 3 iterations before I liked it. I’m not totally happy with it, but it’s pretty great as is.

Conclusion:
First real project I’ve attempted. It sounds pretty great, although the crossovers are probably not right and blah blah blah. LOTS of fun to build and I can’t wait to drop it off this weekend.

About the Designer:
I have no idea what I’m doing.

Parts Used:
Everything but the MDF and red paint is from PE.
Lepai LP-S60 4x25W Desktop Mini Amplifier with Remote USB MP3 Media Card FM
Part # 310-306

Chatoya

$
0
0
back_82 drying front_79 logs pr_with_weights spl_chart

Designer:
Neil Davis

Project Category:
Subwoofers

Project Level:
Intermediate

Project Time:
8-20 Hours

Project Cost:
$100 – $500

Project Description:
Chatoya is a solid hardwood subwoofer, made from locally grown hardwood. This project is the second in a series of small woofers that use the 5” Tang Band subwoofer driver. This variation uses a single driver with a passive radiator and a 100W amplifier. But what makes this project special is the beautiful cherry wood and the way the wood “comes alive” with a penetrating oil finish. The finish has an iridescence that causes light and dark areas that “move” when the box is rotated. This effect is called chatoyancy (from the French word for “cat’s eye”). I have a hard time remembering that term, so the project name is a mangled version of “Latoya” or “Tafoya”, which are popular names that are easier to remember.

Design Goals:
There were several goals for this project. First, I needed a nice looking compact subwoofer for a 2.1 system (the other parts of the 2.1 system are described in a separate project). Another goal was to demonstrate that loudspeakers do not need to be made from MDF. In fact, there are many good reasons why hardwoods can be an excellent building material for speakers, even for a subwoofer. And finally, this project allowed comparing a passive radiator design with a sealed woofer approach that was described in my “Act 1” project.

Driver Selection:
One of the best drivers for a small subwoofer is the Tang Band W5-1138SM (264-831). This little driver features an impressive 9.25 mm of Xmax and there really aren’t too many other drivers in this size that can provide as much bass output. The passive radiator (PR) will need to move a larger volume of air than the driver, so you need to select either a 6-1/2” or 8” PR to work with the W5-1138M. I had a high-excursion Seas H9928 laying around that I ended up using, but the Dayton 295-492 (8”) could also work well. The Dayton 295-498 (6-1/2”) would be OK for lower volumes, but it doesn’t have enough excursion to get the most output from this woofer.
The amplifier is the same 100W Yung SD100 used in the Act 1 project, except for this application the unboosted version (301-500) works better. The Yung amp is well built, compact, light weight, and provides plenty of power for the TB W5-1138 to reach full excursion.

Enclosure Design:
This version of the W5-1138 subwoofer was intended to be smaller than the sealed version and uses a passive radiator. The enclosure ended up being about 15L. I used the PSD-Lite program to model the overall response and determine the amount of additional mass needed for the passive radiator. PSD-Lite is more useful than other modeling programs for this design because it also models the response of the amplifier. It turns out the “unboosted” version of the Yung amplifier has a small amount of boost associated with the highpass filter. The circuit board has a separate MFBP filter that is used for the boosted version of the amp, tuned to 45Hz, and this MFBP filter is disabled. But the “Q” of the high pass filter is 1.2, which provides about 2 or almost 3db of boost at 30Hz. It turns out this slight boost works out very well to extend the response almost perfectly flat down to 30Hz, as you can see from the response chart. It’s easy to experiment with different weights for the passive radiator by rolling the mouse wheel in the “added” mass textbox. I kept looking at both the SPL and excursion charts, as the peak excursion exceeded the mechanical limits for high input power. After some experimenting with different values of added mass and power levels, it became clear that the input power needed to stay below 40W to avoid excessive excursion. That’s the rated continuous power of the driver, so the driver, amplifier, and passive are well matched. The resulting response is almost perfectly flat down to an F3 of 28Hz, at a maximum output of 96dB for 40 Watts of input. The high pass filter and port response results in a very steep low frequency roll-off, with an F10 of 26Hz.
The best tradeoff of response and excursion was with an added mass of about 35-40 grams. The 3/16” by 1-1/4” fender washers sold in bulk at Home Depot measure about 7 grams apiece on my wife’s food scale. 5 washers gave me about the mass I needed. One of the pictures shows the washers attached to the passive radiator. Since the SEAS passive radiator is no longer available, I specified the 8” Dayton Audio SD215-PR in the parts list. That passive radiator should give about the same results using a 50G weight, or 7 washers.

Enclosure Assembly:
This project started about 4 years ago, when our neighbor at our cabin house in Western Maryland had some locally grown cherry and maple logs that he was going to use in his boiler. He usually uses and prefers the red oaks that are plentiful in this area, so he agreed to have these logs milled—I would pay for the milling, and he would get half of the lumber. We have a local lumber yard that milled the trees for about 40 cents a board foot, so I ended up with a large stack of high quality cherry and maple at a very good price. You can see from the picture of the logs covered in snow that the trees were at least 24” in diameter, so we ended up with about 500 board feet of lumber that was around 10-12” wide and 9 feet long. There is a picture of the wood drying in the living room of our cabin. My wife graciously agreed to allowing the lumber in the living room for about 2 years, after which we starting making some projects.
Cherry has a number of properties that make it well suited for building speaker cabinets. First, it is fairly rigid—much more so than MDF, so it doesn’t require extensive bracing. Second, the wood is relatively stable in the presence of moisture. If you look at wood movement chart such as this one: http://workshoppages.com/WS/Articles/Wood-Movement-Charts.pdf, you’ll see that shrinkage for cherry is smaller than most woods, and that the likelihood of cupping is fairly low. Of course, that stability is one of the reasons it has been a popular wood for furniture making for many years. And if you follow the example in that chart for moisture changes of about 2.5% from summer to winter, the amount of shrinkage or expansion on the order of .3%, which is comparable to MDF. However, most hardwoods have very little di mensional change in the length (parallel to the grain), whereas MDF expands and contracts the same in all dimensions. That means you need to make sure the grain of the wood is properly oriented and that the joints where the grain changes direction is properly secured, with biscuits and glue.
The fine grain and rigid cell structure of the cherry wood is also good from a sonic perspective. There is a common misconception about MDF being a superior material for loudspeakers because it absorbs sound and dampens vibrations, but this simply isn’t true. In fact, Art Ludwig’s interesting experiment with MDF at this link: http://www.silcom.com/~aludwig/Loudspeaker_construction.html shows that ¾” MDF can be a “complete sieve for the sound”. Dr. Ludwig’s experiments show that a constrained-layer panel construction is the most effective technique to dampen resonances, his but his experiments also show that a combination of a rigid cabinet with fiberglass filler will do a good job of minimizing radiation from or through the walls. In order to dampen the back wave from the woofer, I’ve used light stuffing inside the cabinet to act as what Dr. Ludwig calls a “sound sponge”.
A final reason for using cherry is the natural beauty from the fine grain and rich cherry color. There is an animated GIF image at this location that shows the wood from 6 different positions: http://www.audiodevelopers.com/Projects/Chatoya/inside2.gif. As you can see from the animation, the wood almost looks “alive”, with patches of dark and light that move as you change the lighting. The grain of the cherry is very fine, with a mix of denser areas interspersed, and a penetrating finish such as tung oil accentuates the reflections from the grain. The chatoyancy didn’t start to be strongly evident until I had applied about 5 coats of tung oil. After each application of oil, the box was sanded with 1200 grit paper, and it had a total of about 10 to 15 applications of oil.
There aren’t any detailed construction photos, as this was simply a box with mitered corners and lots of urethane glue to fill the voids. And the exact dimensions weren’t too important, as I expected to simply tune the radiator to get optimal output from whatever box size looked nice. So, this was a “fun” build, where I got to build a box without really measuring except to have all the pieces come together in the end, and I worked with some nice, well-behaved wood that looks gorgeous and has local interest. I still need to build a small stand or cradle to protect the finish, but that will come when I build the main speakers that go with the sub.

Tips & Tricks:
I’ve completely glossed over many of the woodworking details because it takes quite a few tools to work with rough-cut hardwood, and most people with these tools are going to know a lot more tricks and tips than I do. Make sure you have someone available you who can give you good advice on how to use these tools safely and can help you with assembly and finishing. The planer generated about 40 gallons of sawdust, so this is a project where you need at least a small woodshop with a dust collector.
PSD-Lite was intended to be a multiway speaker design tool, but there is a mode where you can just work with subwoofers. On the Box Model module, there is a “What-If” tab that lets you design with just one type of driver, which is convenient for subwoofers. Also, PSD-Lite allows you to save the design variables in a self-documenting XML file. If you want to experiment with this design yourself, simply load this file into PSD-Lite, selected the “what-If tab in the Box Design modules and then open the amplifier module recalculate the response: http://www.audiodevelopers.com/Projects/Chatoya/chatoya_PSD_lite.xml.

Conclusion:
In many ways, a high-quality hardwood can be a good choice for a loudspeaker enclosure. It’s rigid, it’s easy to work with, it doesn’t require veneering, and it has natural beauty that you just can’t get with other materials. You need to be careful that the wood is dry and that is has been cut properly, as hardwood’s uneven expansion and contraction in different directions can cause problems. And you will need to pick through the cupped and warped pieces and watch out for knots and an occasional boring insect tunnel. But with some common sense and some good woodworking tools, you can transform a snow-covered log into a beautiful subwoofer.
The passive radiator design results in good low frequency extension without requiring huge amounts of amplifier power, and the combination of the 5-1/4 woofer with a larger passive radiator gives this subwoofer more output than you would expect from its size. The bass output is about the same as the sealed version (Act 1) that used two drivers and a cabinet that is about twice the size. The F3 is even lower than the sealed version that used EQ and that required twice as much amplifier power to extend the response.
This was my first passive radiator design and up to now I hadn’t fully appreciated the benefits of this approach. A comparable ported enclosure would require an unreasonably large port (18” @ 2” diameter), and a comparable sealed version would require either a larger box or a larger amplifier. The PSD-Lite modeling tools were based on the equations from Jeff Bagby’s WBCD Excel model, but I had never actually used the program before for a real design. I can understand now why Jeff was an early proponent of PR designs, and I’m glad he made his spreadsheet available.

About the Designer:
Neil is a member of the 2017 PE speaker builder design team (SBDT).

Parts Used:
264-917, Tang Band W5-1138SMF 5-1/4″ Paper Cone Subwoofer Speaker
301-500, Yung SD100 100W Class D Subwoofer Plate Amplifier Module No Boost
295-492, SD215-PR (for new designs), with 7 fender washers (50G weight)
30” diameter cherry log, milled to 1” thickness and dried for 2 years

A Compact Point-Source Open Baffle

$
0
0
ob12pfront ob12prear ob12pwiring3 ob12pbox ob12pwiring2 ob12pwiring1 ob12pstuffing ob12pschematic ob12psweep13feb17

Designer:
Craig J Coley

Project Category:
Freestyle Speakers

Project Level:
Beginner

Project Time:
1-8 Hours

Project Cost:
$100 – $500

Project Description:
This project is called the Coley OB-12P Point Source Open Baffle speaker. It is a full range open baffle achieving point-source performance through a coaxial driver set. It presents high impedance to the amplifier at high frequency, excellent for use with Single Ended Triode (SET) tube amplifiers.

Design Goals:
After observing the performance of the Coley OB-12C cart speaker, a decision was made to redesign it for use as a stand-alone speaker system. Designing the speaker as a point-source provides not only sonic superiority but also provides relatively compact packaging. Electronic compensation would be used to flatten the response characteristics of both the polyimide tweeter as well as the woofer.

Driver Selection:
Full range open baffle speakers require a large woofer to move enough air to have acceptable bass. An Eminence Beta-12CX was chosen as the woofer due to its 97 dB sensitivity, 0.48 Qts, and 1” coaxial port. A Dayton D250P-8 polyimide compression driver was chosen for the tweeter after experiencing harshness with titanium compression drivers. The D250P-8 can also be crossed over at a relatively low 1100 Hz, avoiding the 2 KHz hump in the Beta-12CX response curve. The two drivers together form a full range point-source speaker.

Enclosure Design:
The OB-12P is a simple open baffle made from 16” x 16” x 0.75” edge glued pine panel but any suitable panel material can be used. A Hammond 1590F 7.4” x 7.4” x 2.65” aluminum enclosure is used to house the crossover and is side mounted just below the drivers on the baffle so that it can also act as a support. Since a custom crossover is used to flatten and correct driver response, the baffle size is not as critical and can be modified to achieve whatever aesthetics the builder might desire.

Enclosure Assembly:
Because the OB-12P is a simple open baffle, construction is quick and easy. Once the 16” x 16” baffle panel and 11” driver hole is cut, all edges can be finished with a router and round-over bit. If solid wood as shown is used, all holes must be predrilled to prevent splitting. I personally use a .099 predrill and #6 x 3/4” screws to mount the Eminence Beta-12CX and the Hammond 1590F enclosure.

The side of the Hammond 1590 enclosure is screwed to the baffle upside down immediately below the drivers so that it can also serve as a rear support. The box is mounted upside-down so that crossover components can be mounted to the box lid for easy access which also puts the crossover mounting screws facing the floor and out of sight. Three rubber feet are used, one each mounted to the right and left sides of the baffle and a third mounted to the Hammond box lid. This method retains stability even if the floor is not level.

Crossover Design:
The crossover is a custom shunt type with high and low frequency driver compensation. C1 and L2 form a first order shunt crossover at 1100 Hertz. L1 and R1 compensates roll-off below 100 Hertz on the Eminence Beta-12CX and C2 compensates roll-off above 8 Kilohertz on the Dayton DT250P-8. R2 functions as an attenuator to match the overall level of the DT250P-8 to the Eminence Beta-12CX. Design optimization was done in SPICE, using measured driver parameters. The resulting performance is excellent from below 50 Hertz to 20 Kilohertz. The use of the Dayton DT250P-8 polyimide compression driver ensured no driver resonance above 20 Kilohertz that can add harshness to the sound.

Tips & Tricks:
Although I never heard any mechanical resonances, I did tightly fill the Hammond 1590F enclosure with Acousta-Stuf filler as a precaution. An alternative to the Hammond 1590F enclosure is not recommended because it not only encloses the crossover but also acts as a heat sink and rear support of the 20 pound baffle.

Conclusion:
Driven by a Coley 215SE 15W SET amplifier, the performance of the OB-12P is outstanding with encompassing bass, excellent separation and delicate highs. The polyimide tweeter gives a transparent and delicate touch to the highs without a hint of the harshness I had previously encountered with titanium compression drivers.

Even though some efficiency was sacrificed for flat response, the volume capability is more than adequate at far less than the 15W capability of the 215SE. For those who may want more, the design as shown can easily handle an amplifier up to at least 25W.

About the Designer:
This project was designed and built by Craig J. Coley of Burleson, TX. I work as an electrical designer and am listed as inventor on 8 US patents in the field of avionics. Contact me at craigjcoley@gmail.com.

Project Parts List:

Eminence Beta-12CX 12″ Coaxial Driver
Dayton Audio DT250P-8 1″ Polyimide Compression Horn Driver 1-3/8″-18 TPI 8 Ohm
Dayton Audio DMPC-40 40uF 250V Polypropylene Capacitor
Dayton Audio DMPC-0.10 0.10uF 250V Polypropylene Capacitor
Jantzen Audio 0.60mH 15 AWG Air Core Inductor Crossover Coil
Hammond 1590F Aluminum Diecast Case 7.4″ x 7.4″ x 2.65″
Acousta-Stuf Polyfill Speaker Cabinet Damping Material 5 lb. Bag
Parts Express #6 x 3/4″ Deep Thread Pan Head Screws Black 100 Pcs.
Penn-Elcom 9101 Rubber Cabinet Foot 0.86″ Dia. X 0.53″ H
Crossover L1- Triad C-56U 35.0mH Inductor
Crossover R1- Vishay/Dale RH02550R00FC02, 50 Ohm, 25W
Resistor
Crossover R2- Vishay/Dale RH02512R00FC02, 12 Ohm, 25W Resistor

The Brick

$
0
0
front_pic_of_speakers driver_placement speaker_inside

Designer:
Cory L

Project Category:
Portable Speakers

Project Level:
Beginner

Project Time:
1-8 Hours

Project Cost:
Under $100

Project Description:
I wanted a project that my elementary aged boys could participate in and learn more about sound and electronics. Since both were getting iPods over the holidays, a portable speaker seemed like the perfect project. Rather than purchase speakers from the local big box store, I decided to scour the Parts Express web site for the right components to build our own.

Design Goals:
The primary design goal for this project was simplicity. I wanted to keep the design simple with as few materials as possible to not only reduce cost but also allow my kids the ability to help construct the speaker. I also felt that with fewer components it would be easier for the kids to understand how the speaker functioned. Lastly, I wanted the speaker to be portable and easy to operate. For this reason, I chose an amplifier that could be powered with cheap disposable batteries and had an onboard 3.5mm input jack for audio.

Driver Selection:
I chose the Dayton Audio CE32A-4 1-1/4” mini speaker for this project. The decision was based primarily on the amplifier wattage, specifications of the speaker, appearance of the driver and cost. My original plan was to use only two drivers per speaker but through trial and error with the first one I ended up using four. Despite their minuscule size, the CE32A-4’s produce a very nice sound and do a good job with most types of music.

Enclosure Design:
The enclosure designs were both rectangular utilizing the materials we had on hand while allowing enough real estate for the speaker components. I worked with both kids on speaker placement within the enclosure and allowed them to “approve” the final design. Given the design goal, we were limited on the overall shape of the enclosure.

Enclosure Assembly:
The enclosure consists of ½” oak boards purchased from the local big box store. We used wood from the project section of the lumber isle. The front and back panels are made from a single .5” x 3.5” board. The sides, top and bottom are cut from a single .5” x 1.5” board. We used butt joints for this enclosure, keeping with the design goal, and #6 x 1 in. wood screws to assemble. We avoided using any glue or sealant as its messy and not required for this design.

Crossover Design:
This project does not utilize a crossover.

Tips & Tricks:
The first speaker we built I often refer to as the “brick” mainly due to the location of the drivers. This was our trial an error speaker and through it learned some valuable lessons that greatly reduced the build time for the second speaker. First and foremost, please change the amplifier dip switch for volume control (K1) to ON (reference owner’s manual). This will disable the volume controls on the board and seemed to drop the output of the amplifier. This will allow full volume on your listening device without over powering the speakers. Second, I found that using a 1-1/4” hole saw worked the best for cutting openings for the drivers. Lastly, while we used a lot of what we had on hand, I would recommend purchasing a mini switch for cutting power to the amplifier. Our re-purposed ones function fine but were difficult to fit into the enclosure and lack a clean, finished look.

Conclusion:
Overall, I am very pleased with how this project turned out. The speakers produce a decent sound that is not overpowering. The latter being a feature that will be greatly appreciated by parents. Additionally, my kids now have a speaker that is easy to use and a sense of pride for having constructed it. They also learned about the components needed to produce the sound they so much enjoy. If you are searching for an easy kid’s project, to get them interested in sound and electronics, I highly recommend this one.

About the Designer:
I have been interested in sound and electronics since I was a little kid. I have built several sets of speakers over the years and have been a repeat customer of Parts Express.

Project Parts List:

Dayton Audio CE Series CE32A-4 1-1/4″ Mini Speaker 4 Ohm
Sure Electronics AA-AB32131 2x2W at 4 Ohm Class-D Audio Amplifier Board
2 AA Cell Battery Holder
Audtek Electronics 35SS01 3.5mm Stereo Male to Male Slim Shell Audio Cable 1 ft.

The Hammer

$
0
0
hammer5 hammer3 hammer7 hammer2 hammer8 hammer10 hammerfinal

Designer:
Chuck Morris

Project Category:
Subwoofers

Project Level:
Intermediate

Project Time:
8-20 Hours

Project Cost:
$100 – $500

Project Description:
Dual opposed 10″ subwoofer with outboard DSP/amplifer

Design Goals:
Smallish form factor, dual opposed, force canceling, visual match to my MidNite Magic project

Driver Selection:
Dayton Audio LS10-44 DVC subwoofers P#295-251

Enclosure Design:
Sealed 15″ cube, dual opposed driver layout

Enclosure Assembly:
3/4″ material throughout, 1/2″ BB ply added at driver baffles, 1-1/2″ brace connects top, bottom, front, and back walls. 1lb of loose polyfill, walls lined with 3/4″ 3layer Sonic Barrier. Jacks located on bottom.

Crossover Design:
Active via DSP in amp

Tips & Tricks:
The cabinet needs to be well sealed. Add additional sealant at all joints if necessary. I had to upgrade the Nuetrik connector as the plastic version failed under heavy volume.

Conclusion:
The sub performs better than I had hoped. Clean, deep, and virtually resonant free. It does a great job of filling in the last couple of octaves in my rooms.
What makes the system work is the DSP in the inuke amp. I used the PEQ to add boost that lowered the f3 to 25Hz. The subs handle everything the amp is able to provide and with more than enough output for most.

About the Designer:
I am member of the Speaker Builder Design Team

Project Parts List:

Dayton Audio LS10-44 10″ Low Profile Subwoofer Dual 4 Ohm
Behringer NU1000DSP iNUKE 1000 Watt Power Amplifier with DSP
Sonic Barrier 3/4″ 3-Layer Acoustic Sound Damping Material with PSA 18″ x 24″
Parts Express Cast Frame 1/4″-20 Speaker Mounting Kit
Dayton Audio DSS3-BK Black Speaker Spike Set 4 Pcs.
Dayton Audio BPA-38NI HD Binding Post Pair Nickel
Neutrik NLT4MP Speakon STX 4 Pole Male Chassis Connector Metal Housing
1 lb Loose Polyfill

Portable Ammo Can Boombox

$
0
0
20160103_134456 20160101_150153 20160103_1215471 20160103_121527 20160103_121547 20160101_125629 20160101_144456 20151216_173059 20151225_133509 20151225_135928 20160101_111416__copy

Designer:
Daniel

Project Category:
Portable Speakers

Project Level:
Intermediate

Project Time:
8-20 Hours

Project Cost:
$100 – $500

Project Description:
Hey guys, just want to show you the 50 cal ammo can boombox I built. I bought most of my parts on parts express. I couldn’t find a wiring diagram online, so after a bunch of research and deciding how I want it wired, I finally reached a wiring diagram I was happy with.

This thing is REALLY loud, words cannot describe it. It has a master power switch, a secondary switch which shows voltage only so I can see charge state, uses a 12 volt SLA battery, has a seperate input to charge the battery and also a DC connector for running off wallpower. I kept the plugs different so the wrong one can’t be hooked up to the battery by accident. It only accepts AUX input, no bluetooth on this build. Always something I could add in if I wanted to eventually.

Build time I would estimate about 10-12 hours, but it’s been a while since I built it so I don’t remember the exact time.

Video of the project can be found on my youtube page
https://www.youtube.com/watch?v=eCMNcBtBLoE

Design Goals:
Wanted a portable, long lasting, loud boombox in a rugged design

Driver Selection:
Clarion SRG1023R speakers, 4 inches
200 watts peak, 30 watts RMS 4 ohms

Enclosure Assembly:
50 cal style ammo can cut out with a dremel and various bits

Tips & Tricks:
The speaker holes were the hardest! Tore up a few good bits cause I didn’t have a proper hole cutting saw for the big holes

Conclusion:
Overall this works great. It lasts a long time and wasn’t too pricey. About 150-170 dollars and your time

About the Designer:
Xray tech, love working on electronic projects, good at soldering, good handyman around the house, scuba diver, cars

Project Parts List:

Dayton Audio DTA-2 Class T Digital Audio Amplifier Module
3.5mm Stereo Panel Mount Jack
SPST Heavy Duty Toggle Switch – Spade Connectors
SPDT Heavy Duty Toggle Switch
Switch Cover Transparent Red
2.1mm Panel Mount DC Jack
Small Aluminum Guitar / Amplifier Knob 0.5″ – Black
NTE 25-B600-03 3 Pole 25A Panel Mount Barrier Terminal Strip
1/4″ (22-18) Nylon Insulated Female Disconnect Crimp Flag Terminal Red 10 Pcs.
1/4″ (16-14) Nylon Insulated Female Disconnect Crimp Flag Terminal Blue 10 Pcs.
2.1mm x 5.5mm x 9.5mm DC Plug
Power-Sonic PS-1290 Sealed Lead Acid Battery 12V 9Ah
Parts Express 3.5mm Male to Male Slim-Plug Shielded Audio Cable 1 ft.
DPDT Heavy Duty Toggle Switch Center Off – Spade Connectors
Grip Tools 37144 Electrical Terminal Assortment 180 Pcs.

Bluetooth Tardis and furry speakers

$
0
0
img_5707 img_4806 img_1930 img_6333 img_8503

Designer:
James

Project Category:
Bookshelf Speakers

Project Level:
Beginner

Project Time:
20+ Hours

Project Cost:
$100 – $500

Project Description:
Toy T.A.R.D.I.S. turned into a bluetooth amplifier with 3.5 plug, and a set of fur covered bookshelf speakers.

Design Goals:
Wanted to make a fun set of real speakers for my daughter’s room. She’s a huge Doctor Who fan, so I decided to find a toy T.A.R.D.I.S. and stuff a bluetooth amp in it. Did not have to have supreme sound quality, but needed to be simple to use and relatively inexpensive

Driver Selection:
woofers: 299-2120 – clearance items – I think they were $14 or so each
tweeters: 292-462 – about $15 for both

Enclosure Design:
Funko T.A.R.D.I.S. purchased from local comics shop – $17
.5″ MDF boards for speaker boxes
1″ ID PVC pipe, 2″ long for ports from Home Depot
2 yards of Blue Fur from Jo-Ann Fabric (on sale for 10 bucks!)

Enclosure Assembly:
Simply glued and screwed together the MDF, cut holes with a Jasper jig on a plunge router. Secured the PVC ports with silicone caulk, and spray-glued the fur on.

Crossover Design:
269-2196 – $1 each! These have a full-spectrum set of leads for the woofer, and a choice of two high-pass leads (one crosses at about 4200, the other at about 2000). I used the 4200 ones, which probably means there’s a bit of a gap between the woofers (rated to 4K) and the tweeters, but I can’t hear it.

Tips & Tricks:
I used a Dremel-style rotary tool with a conical bit to do all the cutting in the T.A.R.D.I.S., and it was super clean. No breakage at all. I was able to mount the blue LED for the bluetooth connection indicator right under the lantern on top of the police box, which is a fun detail.

Conclusion:
Lots of fun to make. Daughter loves it. I wish it had just a little more power, but I suppose that’s my fault for using a slightly under powered wall wart. Might buy a bigger power supply just to see what it can really do. Speakers have plenty of bottom for a bookshelf.

About the Designer:
I have no training in this sort of thing. Just figuring things out as I go and trying not to get hung up on things not being perfect.

Project Parts List:

Wondom AA-AC11162 2x50W 4-8 Ohm Class D Audio Amplifier Board BT4.0 with Functional Cables
Wondom AA-JA11115 L-type Aluminum Bracket
GRS 1TD1-8 1″ Dome Tweeter 8 Ohm
Funko T.A.R.D.I.S. purchased from local comics shop – $17
.5″ MDF boards for speaker boxes
1″ ID PVC pipe, 2″ long for ports from Home Depot
2 yards of Blue Fur from Jo-Ann Fabric (on sale for 10 bucks!)

Oak 2.1 Boombox

$
0
0
img_20170307_212451 img_20170307_212528 img_20170307_212612 img_20170305_223821 img_20170225_215845 img_20170302_220112_1


Designer:
Jonathan

Project Category:
Portable Speakers

Project Level:
Beginner

Project Time:
8-20 Hours

Project Cost:
$100 – $500

Project Description:
A compact bluetooth boombox with the power supply and subwoofer built in.

Design Goals:
This was one of my first complete builds. I wanted a bigger boombox for my workshop that I could also use around the house. It replaces a miniature box I built with BMR drivers that had almost no low end. I wanted it to be compact and clean with no external power brick and minimalist interface.

Driver Selection:
I chose the Tectonic Elements TEBM35C10-4 BMR 2″ Full-Range Speaker (#297-216) and the Tang Band W3-1876S 3″ Mini Subwoofer (#264-909) for their similar appearance and small size. I also liked the wide dispersion from the BMR driver in my work area. The whole thing is powered using the buyout Mini Hi-Fi 2.1 Class D Audio Amplifier Board (#329-608) which sounds pretty good and has an integrated volume pot.

Enclosure Design:
The box is a long rectangle approximately 15″ x 5″ x 6″. The subwoofer is mounted in roughly 1.4 L with a passive radiator. The BMR drivers are sealed in roughly 0.7 L. A fourth chamber houses the amp, Bluetooth reciever, and 75W power supply.

Enclosure Assembly:
The box is assembled from 1/2″ oak board from the big box store. The front and back panels are 1/4″ oak board. Besides the back panel, everything is rabbeted / dado’d and glued. I cut the driver holes with a router circle jig and everything else with a jigsaw. I rounded all the edges with a router and sanded the joints flush. I used Minwax ‘Cherry’ stain (though not as dark as I’d like, for some reason) and three coats of satin polycrylic.

Crossover Design:
There is no crossover but I did put a 3-ohm resistor in series with each of the BMR drivers. It sounded a little ‘shouty’ and the bass had to be maxed out to match it — the resistor quieted it down and the levels match better now. I didn’t use an L-pad because the speaker was 4 ohm impedance and the amp is rated for 8 ohms. The amp board has a fixed 150Hz low-pass filter for the sub channel. There’s also a separate pot to adjust the subwoofer level.

Tips & Tricks:
The box depth is 6″ — 5.5″ standard board width and 1/4″ baffles. This way I didn’t have to rip-cut any boards.

The Q&A sections for all of the Parts Express products I used typically have enclosure recommendations and box tuning information. Lacking access to any special software, this was a big help to double-check calculations.

Conclusion:
The sound is really great for what I listen to, mostly rock and electronic/pop music. There’s a surprising amount of low-end thump from the little subwoofer, and the full-range speakers are clear and loud.

I was really pleased with the clean physical appearance of the box. It’s nice to plug it directly into a wall socket with no brick or anything. It’s small enough to fit on a shelf above my bench, or on the kitchen counter.

About the Designer:
I’m a mechanical engineer who got into building speakers when I saw a DIY tabletop speaker in a store and I thought “I can build that!”. I enjoy woodworking but had minimal prior experience with electronics or music.

Project Parts List:

Tectonic Elements TEBM35C10-4 BMR 2″ Full-Range Speaker 4 Ohm
Tang Band W3-1876S 3″ Mini Subwoofer
Peerless by Tymphany 830878 3-1/2″ Passive Radiator
Mini Hi-Fi 2.1 Class D Audio Amplifier Board 2x15W + 30W
Sure Electronics AA-AB41136 Bluetooth 4.0 Audio Receiver Board aptX +EDR 12 VDC
Viewing all 739 articles
Browse latest View live


<script src="https://jsc.adskeeper.com/r/s/rssing.com.1596347.js" async> </script>